Installing Lift AI
Sign up for a Free Trial or Contact Sales to get the link to set up your trial.
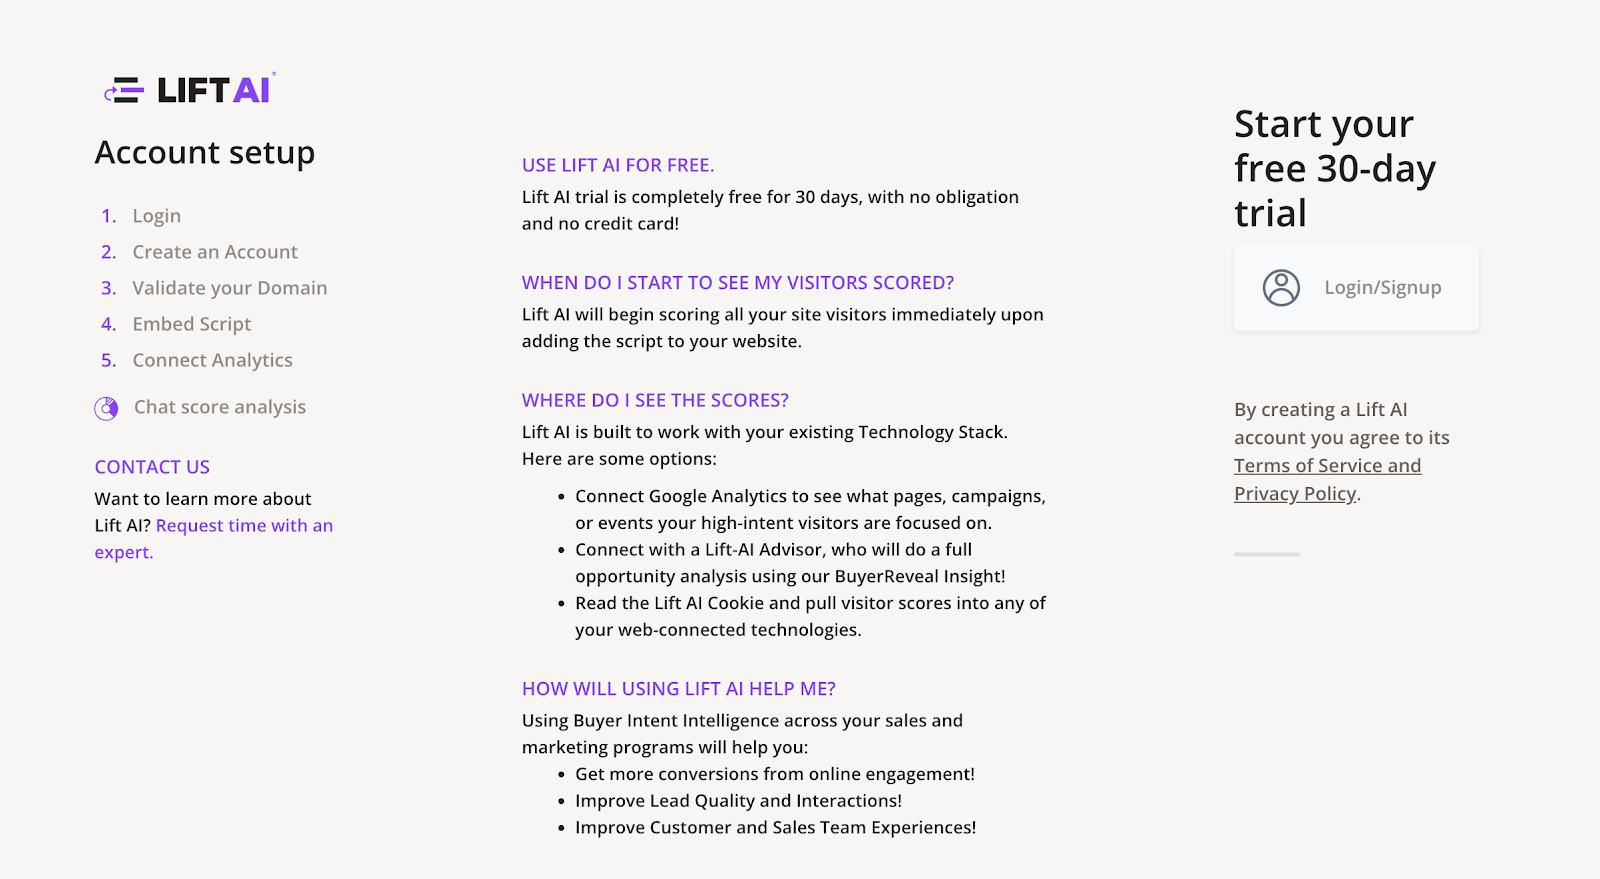
Click Login/Sign-up
Choose your login method:
- LinkedIn or
- Create an account with your email.
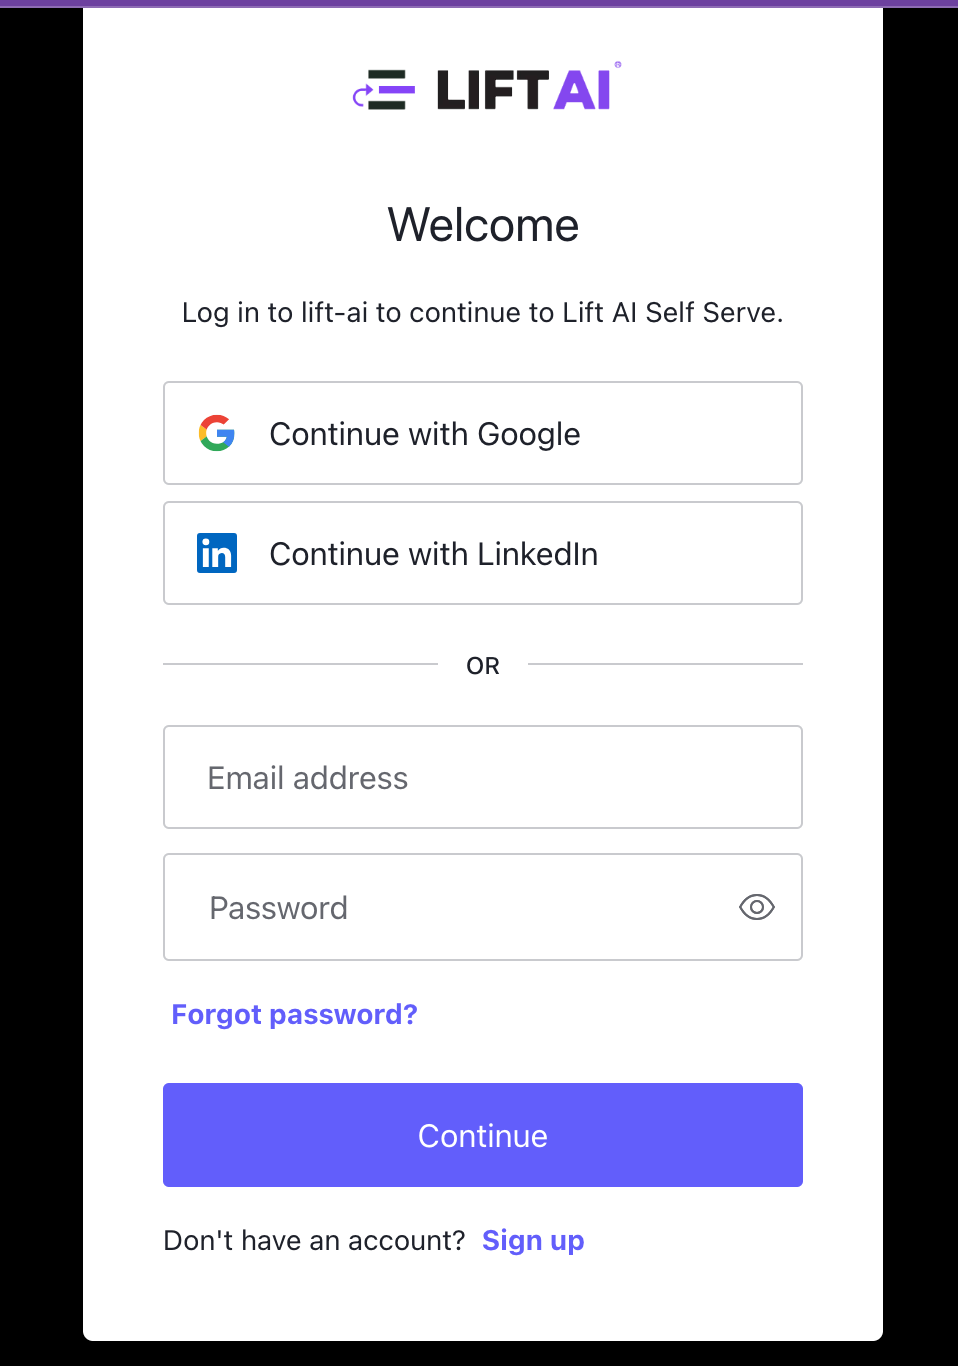
- When prompted, enter your company name, and you will be directed to the installation page.
(Optional) Connect Google Tag Manager
If you want to use our Tag Manager Integration, go to the Integrations page and authenticate to your Tag Manager
- To deploy Lift AI Code via Google Tag Manager Integration, click on "Connect Google Tag Manager."
Skip this step if:
- If you plan on installing Lift AI code on your website manually
- Have specific containers you need to use in your tag manager
- Are not the person that would need to publish the code
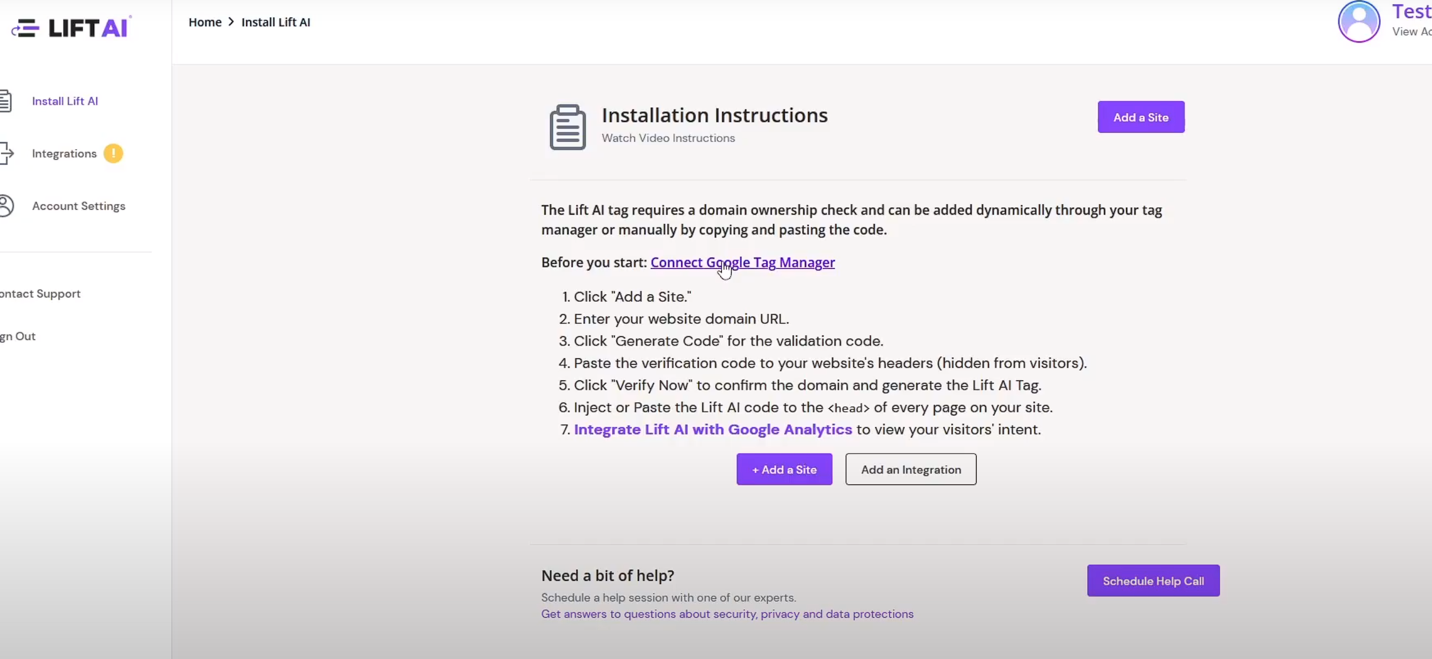
- On the integration page, click the toggle button to enable the integration.
- Authenticate with your Google Tag Manager Account
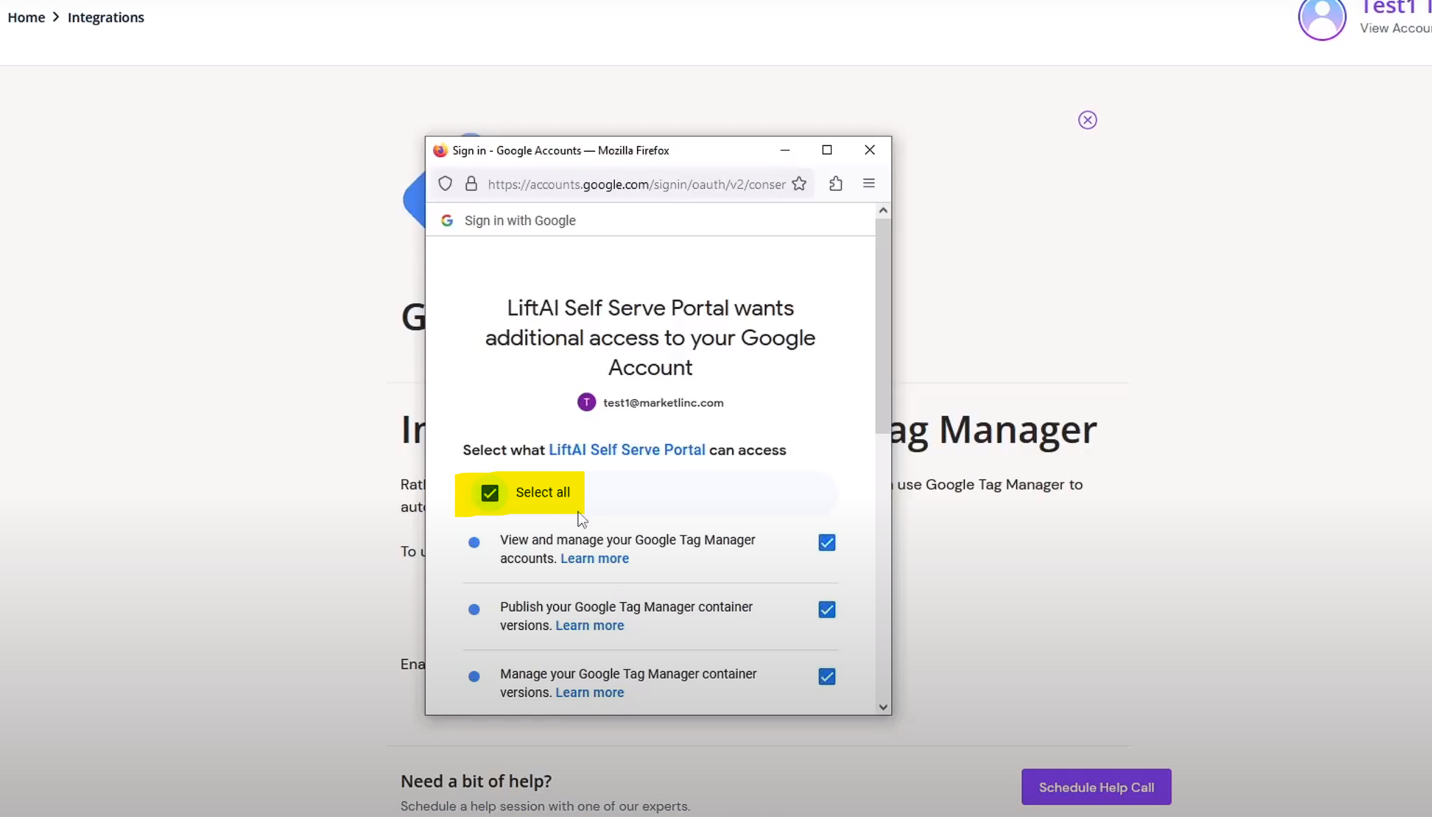
- Please click "Select All" for the permissions
- Scroll down, and select "Continue".
Verify Your Website
Before Lift AI can be installed, we need to verify you are the domain owner before we provide installation code.
Click the purple button for "Add a Site"
Enter the Website URL and select "Generate Code"
- This code is purely for validation purposes, and is not Lift AI functionality.

- Either copy the generated code snippet into the </head> of your website’s master code or create and publish a custom html tag in your Tag Management Tools
- Ensure the verification tag in on the homepage of the domain you entered
- If using a staging site, ensure login is not required to the homepage of the domain for verification to work
- If you have cookie consent process on your site, make sure the explicit consent is not required
- Ensure you have the ability to publish the code on your site (or can work with someone who is authorized)
Contact us to get verification assistance, if any of the above 3 items are not possible.
- Instructions for how to do this can be found at the bottom of this article, called "Tips: Adding Lift AI Code to Google Tag Manager
- Once that has been done, click "Verify Now"
- Once validation passes, the Lift AI functional code will be generated for your site
Inject the Lift AI Functionality Code
You will now see the full Lift AI functionality code in the grey box.
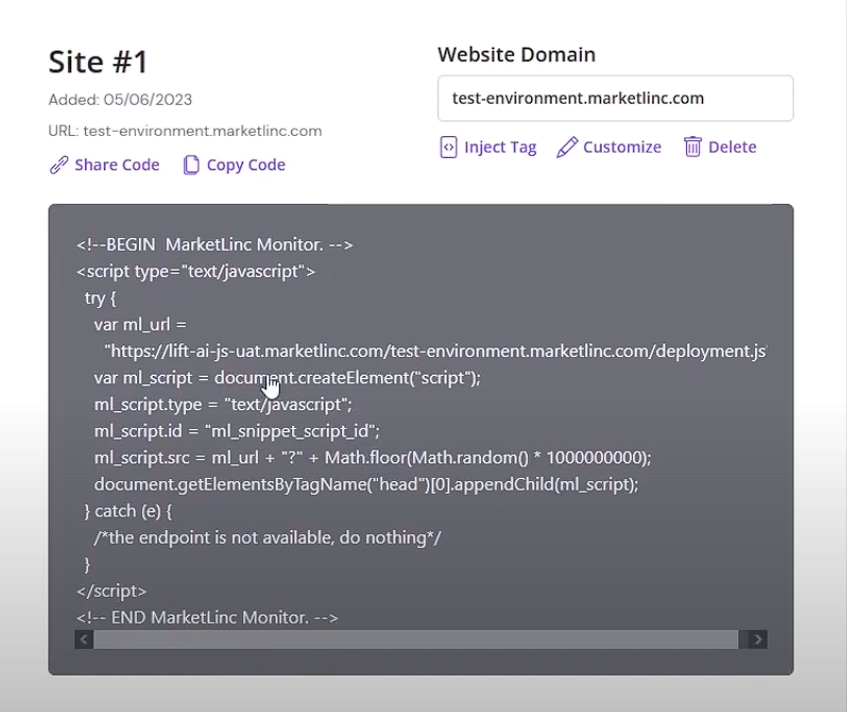
The steps to install this code are similar to before, however:
- If you connected Google Tag Manager, select “Inject Tag” to deploy the code to do so automatically.
Alternatively, you can:
- Use GTM directly by copying the code and configuring a custom HTML tag
- Or, manually paste this is in the </head> of your website code so it appears on every page.
Once the code has been added to your site through either of these methods, Lift AI will begin scoring.
- To score multiple sites, follow the instructions above to add and install the code for each additional website.
Tips: How to Add Lift AI Code to Google Tag Manager
Instead of pasting the code on your website manually, you can install Lift AI as a "custom HTML tag" via Google Tag Manager (GTM)
Step 1: Install HTML Tag
To create a new Custom HTML tag:
- Click on the Tags menu on the left of the screen, then the "New" button
- Name the tag "Lift AI Verify"
- Click Tag Configuration and select "Custom HTML" from the slide-out menu
- Copy the tag code provided by Lift AI and paste it into the HTML field
- Click on Triggering and select "All Pages" from the slide-out menu
- Press "Save" when finished

2. Publish the Google Tag Live
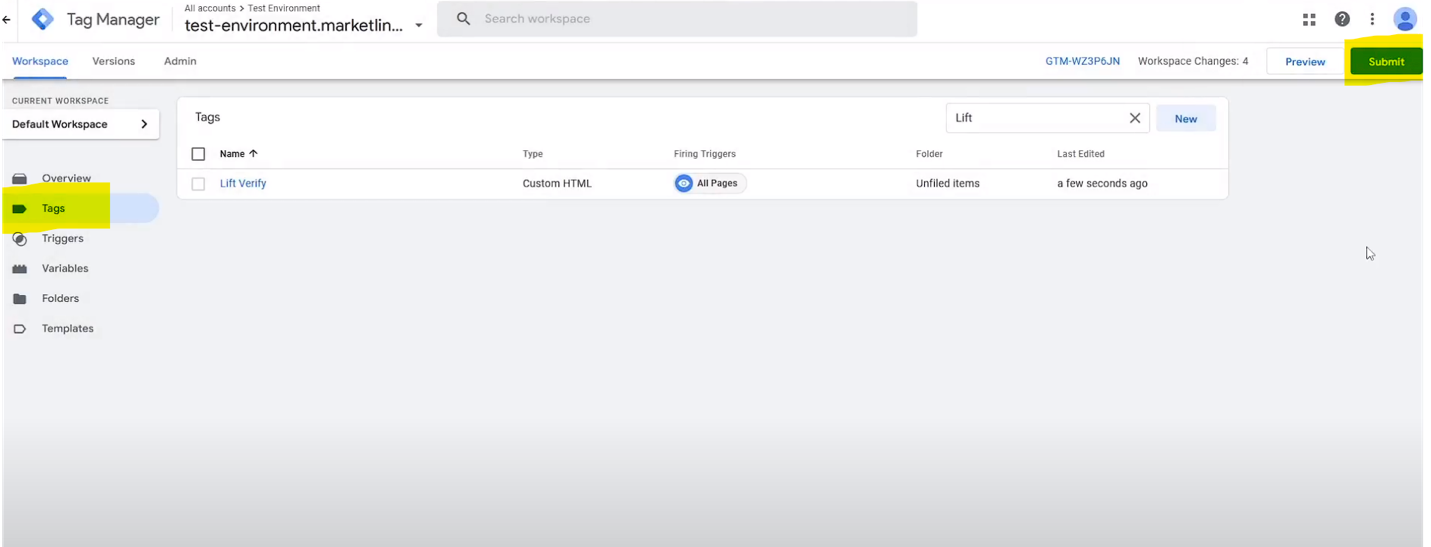
Now that you've added the new Tag, you need to publish it live.
From any screen, click on "Submit" on the top right
On the pop-up window, press "Publish" on the top right
You can add details to the pop-up window if you wish, or you can just press Skip or Continue
3. Verify the Tag on Lift AI Portal
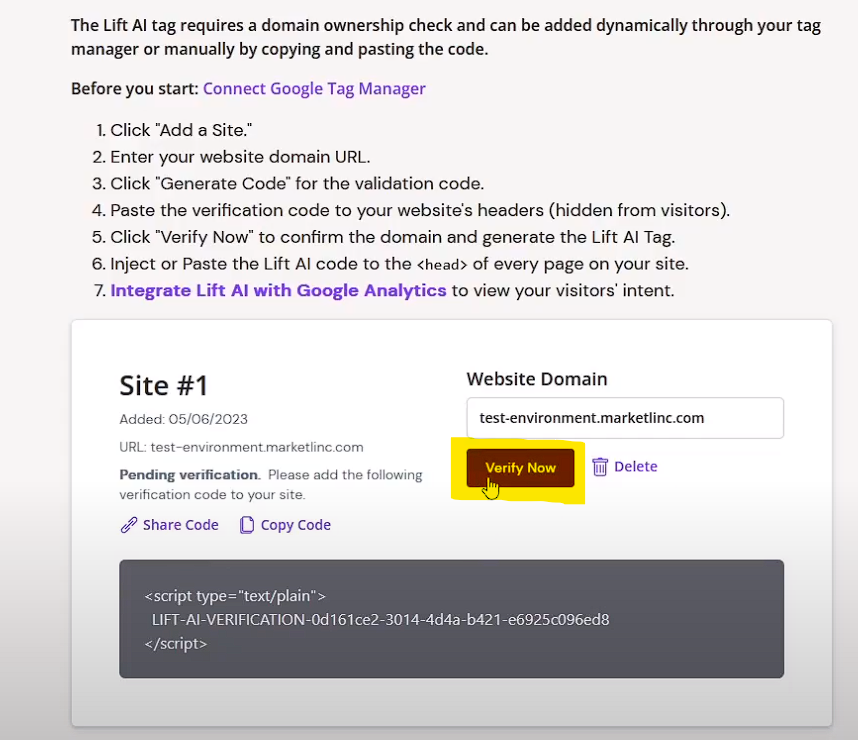
Back on the Lift AI installation instructions portal, make sure you're on the "Install Lift AI" page which is found on the left side of the screen
Find the website listing you added, and click on the "Verify Now" button
If successful, you will see a message. If not, you may need to contact Lift AI for assistance.
4. Press the "Inject Tag" Button
Once the verification process has finished, click on the "Inject Tag" button
On the next screen, click "Inject Code" button
When finished, you will return back to the Install Lift AI page
Help and Contact Information
- Client Success (clientsuccess@lift-ai.com)
- Technical Professional Services (technical@lift-ai.com)


